Is it a NEIPA or just an IPA

I’m not one to follow trends but I have tried a fair few so called NEIPA’s over the last year or two, and I have had mixed opinions on them,  Cloudwater’s examples have been on the whole very good and enjoyable to drink, but many of the rest have been a waste of money and in a couple of cases drain poor. I even emailed a brewery to complain about one of their beer and the brewery admitted that the batch had a problem, but they sold them any way! Needless to say it’s rare I buy unknown beers in cans now when it comes to NEIPA’s and for that matter any bear style. Rant over with on to the real topic of this post.

If you take the right yeast, a load of hops and 100% pale ale malt can you make a trendy hazy IPA with a nice mouth feel? No wheat, no dextrin malt, no oats or any other protein rich adjunct! Lets find out.

This latest brew was a pretty simple one aiming for a 6% beer, 50% Low colour Maris Otter/50% Maris otter, Wyeast 1318 (old Boddingtons strain, or better known as the new trendy White Labs London Fog yeast) and 1.3kg of Galaxy hops.

This was for a 80L batch, which I was hoping to net 55-60L of finished beer from, I had calculated approx. 20L would be lost to dry hopping!

The yeast was grown up in a 2 stage starter, 1L followed by 7L and was prepared a few days in advance and stored in a fridge until the morning of the brew day.

Water profile – what I use for all Pale ales and IPA’s

  • Ca 60ppm
  • SO4 120ppm
  • Cl 70ppm

It was a very standard brew day, the grain was milled first thing and the mash was on by 8am, a single infusion mash was conducted at 65degC with the RIMS system maintaining the temp for the duration of 60min.

Wort transferred to the boiler, mash sparged, and the wort boiled for 90min, hop additions as below. Nutrients and whirlfloc added at 10min.

Wort transferred to the whirlpool and sizable hop addition added for a 30min rest, and the wort was then knocked out to fermenter, the wort was further cooled by jacket to 17degC, oxygenated and yeast pitched.

Here is the full recipe

Ingredients
Amt Name Type # %/IBU
9.75 kg Pale Malt (2 Row) low colour UK (4.0 EBC) Grain 1 50.0 %
9.75 kg Pale Malt, Maris Otter (5.9 EBC) Grain 2 50.0 %
20.00 g Galaxy [14.00 %] – Boil 90.0 min Hop 3 8.7 IBUs
35.00 g Galaxy [14.00 %] – Boil 10.0 min Hop 4 5.2 IBUs
70.00 g Galaxy [14.00 %] – Boil 5.0 min Hop 5 5.7 IBUs
250.00 g Galaxy [14.00 %] – Steep/Whirlpool 30.0 min Hop 6 39.3 IBUs
1 pkg – 2 stage starter London Ale III (Wyeast Labs #1318) [124.21 ml] Yeast 7
900.00 g Galaxy [14.00 %] – Dry Hop 3.0 Days Hop 8 0.0 IBUs

Gravity, Alcohol Content and Color

Est Original Gravity: 1.058 SG
Est Final Gravity: 1.012 SG
Estimated Alcohol by Vol: 6.0 %
Bitterness: 58.9 IBUs
Est Color: 8.6 EBC

The IPA fermented out in 5 days, with the dryhops being added on day 4. Contact time for the dryhops was 3 days after which the conical was crash cooled for 8 days before being transferred to a 50L keg and a hand full of bottles.

The beer was then forced carb’ed over night at 75psi and was ready to serve that evening. And was it hazy? Did it stay hazy?

Well here is a poor of the IPA after 2 weeks a 3degC, so yes and yes!

Galaxy IPA

So all you need to make a hazy IPA with a nice full soft mouth feel is the right yeast and a ton of hops. And what does it tase and smell like – its Galaxy – citrus and tropical fruit in a glass, almost fruit juice esk when tasted. I am very pleased with this one, turned out to be every thing I was after in a hazy take on the IPA style.

Cheers


Alpine Duet Clone

Listed in the BJCP guidelines as the number one example of an American IPA and getting great reviews online, especially before the buy out!

If you google Alpine Duet Clone I’m sure you will find all the same info I did, it seems the brewery is very quiet about it recipes, there does seem to be just enough info to put together for Duet, and more than enough info for cloning Nelson, their rye IPA, for this beer there is even a video from the brewery!

So after several hours on the web I came up with the following for a 60L batch, mashed at 66degC, boiled for 90 min:

Ingredients
Amt Name Type # %/IBU
16.62 kg Pale Malt (2 Row) low colour UK (4.0 EBC) Grain 1 84.6 %
1.28 kg Cara-Pils/Dextrine (3.9 EBC) Grain 2 6.5 %
1.28 kg White Wheat Malt (4.7 EBC) Grain 3 6.5 %
0.47 kg Caraamber (59.1 EBC) Grain 4 2.4 %
20.00 g Simcoe [13.00 %] – First Wort 90.0 min Hop 5 11.2 IBUs
40.00 g Amarillo Gold [8.50 %] – Boil 10.0 min Hop 6 4.5 IBUs
40.00 g Simcoe [13.00 %] – Boil 10.0 min Hop 7 6.9 IBUs
100.00 g Amarillo Gold [8.50 %] – Steep/Whirlpool 30.0 min Hop 8 11.9 IBUs
100.00 g Simcoe [13.00 %] – Steep/Whirlpool 30.0 min Hop 9 18.2 IBUs
1 pack and 2 step starter California Ale (White Labs #WLP001) [35.49 ml] Yeast 10
150.00 g DH1 Amarillo Gold [8.50 %] – Dry Hop 3.0 Days Hop 11 0.0 IBUs
150.00 g DH1 Amarillo Gold [8.50 %] – Dry Hop 3.0 Days Hop 12 0.0 IBUs
150.00 g DH1 Simcoe [13.00 %] – Dry Hop 3.0 Days Hop 13 0.0 IBUs
150.00 g DH2 Simcoe [13.00 %] – Dry Hop 3.0 Days Hop 14 0.0 IBUs

Gravity, Alcohol Content and Color

Est Original Gravity: 1.065 SG
Est Final Gravity: 1.013 SG
Estimated Alcohol by Vol: 6.8 %
Bitterness: 52.6 IBUs
Est Color: 11.0 EBC


The brew day was un-eventful, all the number were hit, fermentation proceeded as expected, the beer was dry hopped and then crash cooled before kegging, after 2 days to carbonate it was tasting great.

What I would say about this beer is that it is balanced, the malt backbone supports the hops perfectly, and it’s all about the simcoe and Amarillo!  It drink like a 5% beer it is truly neck-able to the point it’s dangerous!

Having never tasted a fresh version of this beer I have no idea if it’s cloned but it’s a very good balanced beer regardless. I was meant to enter it into the LSE comp but due to having to prioritise the time I have in the shed, bottling this never quite made it to the top of the list. Either way I would say it’s a 40 point beer which would have been in with a chance.

If i were to re brew i think i would increase the dry hopping to 200g per varity per addition giving 800g into 60L of beer, just to try and lift the aroma slightly.

Either way its a great IPA.

Cheers

Richard

Gold Medal success at the UK National Home Brew Comp

To be honest this was no real surprise, I took a time proven recipe, ran it through a brew set up that was more than capable and the end result was a gold medal.

The recipe was a Pliney the Elder clone, which is freely available on the internet, tweaked slightly up to 9%.

The winning recipe is below, there is no surprise in it, the success is simply down to a quality recipe and the process control I now have in place.  I’m at the point now where in the last 4 years I have won 4 gold medals at the national, bizarrely I have never won a silver or bronze!

Its all about the process. In particular it’s all about the whirlpool!

So here is the recipe and key numbers.

Ingredients
Amt Name Type # %/IBU
14.50 kg MO Extra Pale UK (4.0 EBC) Grain 1 88.2 %
0.25 kg Caramel/Crystal Malt – 60L (118.2 EBC) Grain 2 1.5 %
1.69 kg Corn Sugar (Dextrose) (0.0 EBC) Sugar 3 10.3 %
80.00 g Columbus (Tomahawk) [14.00 %] – Boil 90.0 min Hop 4 62.3 IBUs
40.00 g Amarillo Gold [8.50 %] – Boil 45.0 min Hop 5 17.0 IBUs
60.00 g Simcoe [13.00 %] – Boil 30.0 min Hop 6 20.1 IBUs
60.00 g Amarillo Gold [8.50 %] – Steep/Whirlpool 30.0 min Hop 7 7.9 IBUs
60.00 g Cascade [5.50 %] – Steep/Whirlpool 30.0 min Hop 8 5.1 IBUs
60.00 g Centennial [10.00 %] – Steep/Whirlpool 30.0 min Hop 9 8.4 IBUs
60.00 g Simcoe [13.00 %] – Steep/Whirlpool 30.0 min Hop 10 10.9 IBUs
lots California Ale (White Labs #WLP001) [35.49 ml] Yeast 11
100.00 g DH1_Centennial [10.00 %] – Dry Hop 2.0 Days Hop 12 0.0 IBUs
100.00 g DH1_Simcoe [13.00 %] – Dry Hop 2.0 Days Hop 13 0.0 IBUs
90.00 g DH2_Simcoe [13.00 %] – Dry Hop 2.0 Days Hop 14 0.0 IBUs
70.00 g DH2_Centennial [10.00 %] – Dry Hop 2.0 Days Hop 15 0.0 IBUs
50.00 g DH2_Columbus (Tomahawk) [14.00 %] – Dry Hop 2.0 Days Hop 16 0.0 IBUs
45.00 g DH1_Columbus (Tomahawk) [14.00 %] – Dry Hop 2.0 Days Hop 17 0.0 IBUs
40.00 g DH2_Amarillo Gold [8.50 %] – Dry Hop 2.0 Days Hop 18 0.0 IBUs

Gravity, Alcohol Content and Color

Est Original Gravity: 1.075 SG
Est Final Gravity: 1.008 SG
Estimated Alcohol by Vol: 8.8 %
Bitterness: 131.6 IBUs
Est Color: 10.8 EBC
Measured Original Gravity: 1.075 SG
Measured Final Gravity: 1.007 SG
Actual Alcohol by Vol: 9.0 %

Mash Profile

Mash Steps
Name Description Step Temperature Step Time
Mash In Add 44.24 l of water at 71.1 C 65.0 C 60 min
Mash Out Add 0.00 l of water at 74.0 C 74.0 C 10 min

Process control starts at water profile, then on to controlled mash temp using a RIMS, then following the boil having a whirlpool addition of hops and a 30min stand, before being knocked out to the fermenter, all of which is a closed system after the whirlpool to reduce any chance of infection.

The whirlpool is all about adding hop flavour and really is invaluable, it also allow you to keep all the hot break out of the fermenter which really does prolong the shelf life of the beer you produce.

Its then all about pitching enough healthy yeast and controlling the fermentation.

Yeast was pitched at 17degC, alloed to free rise to 19 degC and held there until fermentation was complete. all dry hopping was done at 19degC

Using conical’s allows the yeast to be dumped, followed by the various dry hop additions, they really are a necessity for brewing high quality IPA’s and DIPA’s.

Then it all about the cold crash, cold maturation and importantly finning the beer to insure its bright.

This beer was force carbonated and botted using a beer gun, its bottled bright with a very low yeast cell count, there is enough left as a safety barrier to O2 pick up on bottling but nowhere near enough to affect clarity. And use new bottles! Or autoclave old ones why risk it!

Then all that is left is cold storage up until the very last minute. This beer was hand delivered, way better than any postal service out there!

The result was a Gold medal!

Next up is Brewcon followed by the Black friday comp, for the black friday comp i will be  entering a beer that has previously won gold (2 years ago), can the sucess be repeated?

Cheers

Rich

Brewing at last in the new brew shed

After 6 months the first brew in the new brew shed happened, and it was pretty uneventful 80L of 5% hoppy pale ale. It was then quickly drunk in little more than 3 weeks!

Order is also slowly being acheived in the shed too!

img_2166

However this post is not about a hoppy pale ale it’s all about an underrated and massively under brewed style here in the UK  – the Dry Stout. It seems to always get over looked with people looking to brew bigger stouts which tend to do better in competitions as they tend to stand out more with bigger flavours and high alcohol levels. To prove this point, only 2 Dry Stouts were entered into the 2016 LSE comp, there were however 10 Oatmeal Stouts , 7 Sweet Stouts and 5 Export Stouts.

The best example of a Dry Stout I have tasted in UK is from Barngates Brewery, the brewery is round the back of the Drunken Duck Inn near Ambleside in the Lake District – It’s called Goodhew’s Dry Stout and comes in at 4.3%, it’s a proper session beer and it is floorless, for a cask beer its holds it head remarkably well and has a lovely smoothness to it with a dry finish and balanced hop bitter ness, it is a celebration of dark malts and British yeast all brought into balance by the bitterness.

Another great Dry Stout I came across was when I was in Cork Ireland for a weekend away, it’s brewed by the Cotton Ball Brewery and is called Lynch’s Handcrafted Stout. What I really liked about this was the dry almost grainy finish but smooth at the same time, and use of US and NZ hops in the finish really did work.

I spent a fair bit of time contemplating the grist for this brew, I consulted the usual  books – Brewing Classic Styles,  Modern Home Brewing Recipes and a cracking book called Brewing Porters and Stout, this last book is a must read for any one serious about brewing stouts and porters.

All the Dry stout recipes consisted of pale ale malt, flaked barley, roasted barley, and in some cases a small amount of black, chocolate or crystal malt. It was just simply a case of aiming somewhere in the middle of all the grist’s but not going overboard on the number of malts used, that and I had some helpful advice from the John the head brewer at Barngates Brewery

After much procrastination I came up with the following grist:

  • Pale malt                             66%
  • Flaked Barley                     22%
  • Roasted Barley                   8%
  • Choc Malt                            2%
  • Black malt                           2%

Hops were an easy choice as I had a load of Challenger in the freezer – aimed for 45ibu, with a single bittering addition in the kettle and a reasonable sized addition in the Whirlpool.

Water was built from RO to the specification for Dry Stout in the book Water, with acidification to make sure mash pH was 5.3.

Yeast used for the brew was WLP007, which is kind of my go to house strain at the moment, it really suits my setup using conical fermenters as it loves to flocculate and if not massively dry hoped it also drops bright quickly without the need to use finnings.

Approximately 2 days before wanting to brew I will start to propagate the yeast. For this brew it meant 2 x 25L starters on stir plates.

img_2021

My brewday starts the evening before normally as I need to make the brewing liquor, which when producing 2L a min from a RO machine can take a while especially when I normally need 200L in the HLT for a 100L batch.  The HLT then is heated overnight so that the following morning the HLT is about 78degC.

Then the first thing I do the morning of the brew day is to mill the grain followed by measuring out the salt additions for the mash, it’s then just a case of ensuring the strike liquor is at the right temp and then mashing in.

img_2052

The mash temp for ths brew as 64degC and the mash lasted 90 min with the aim of producing highly fermentable wort. The RIMS was used to maintain the mash temp and to also ensure a perfectly clear wort was produced, this was a single infusion mash with no mash out temp ramp. Following the 90 min mash, the run off/sparge was started with the aim of collecting 116L of wort in the boiler. I only aim to boil off 10% over 90min, i like a nice steady rolling boil, there is no need to try and boil off 20% of you volume!

Once the boil had started the bittering hop addition was added and it was just a case of waiting 80 min before the kettle finnings and yeast nutrient is added.

img_2030

It is normally about this time I put the plate chiller in the oven and get the whirlpool and the fermenter ready for use.

For the Whirlpool this normally means a rinse out with water and a spray out with peracetic acid. The fermenter however got a full CIP as I had emptied it the day before. For the CIP I use a 2% caustic solution and aim to get the inside of the conical up to 80degC – there is very little that will survive this environment.

img_2153

The fermenter is then rinsed out with water and sprayed out with peracetic acid, all the fittings which have been previously cleaned and sanitised are then fitted to the fermenter and it’s ready to be filled.

Following the 90 min boil the wort is pumped into the whirlpool and the whirlpool hop addition is added and then allowed to rest for 30mins before being knocked out via a plate chiller and into the fermenter.

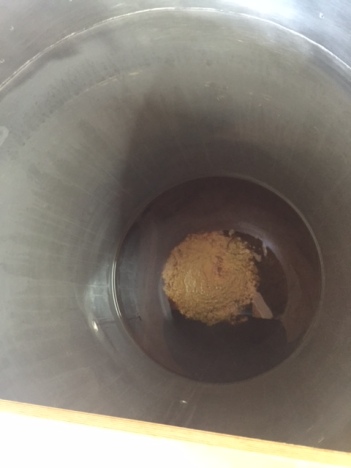
Here is the hop/trub cone in the bottom of the whirlpool

img_2058

On knock out the wort was cooled to about 25degC using the plate chiller, I then use the chiller on the fermenter to drop the temp down to a pitching temp of 17degC. The wort was oxygenated at 2L per min for 3min, and the yeast was pitched shortly after, the temp is allowed to free rise up to 19degC and was then held at 19degC for 4 days before being raised to 21degC for a diacetyl rest. Fermentation was all done in 7days and the beer was perfectly drinkable. If you ferment this type of beer correctly there really is no need for an extended conditioning period.

My normal procedure once fermentation is complete is to crash cool to 2-3degC and hold the beer at this temp for 3-4days before kegging but in this case I omitted this step as just wanted to start drinking the stout!

The beer was transferred to 3 x 19L kegs, 1 x pin and about 20 bottles, the kegs were force carbonated and later that day the beer was on tap.

img_2164

On keg this is a solid dry stout, but I am more interested to see how this is from the cask when served through a beer engine and a sparkler.

The verdict – the fermentation was nice and clean, its got a good silky smoothness to it, it could do will a little more roast almost graininess that you can get for roasted barley so maybe increase this to 10% and may be increase the flaked barley to as much as 25%. Hops wise the overall bitterness is at a good level, the beer can take the 45ibu’s of challenger. I have to admit for the next batch I think I will substitute a small amount of cascade in for the whirlpool addition may be a 50:50 mix, the key here is to just add a subtly undertone and not try and turn it into a fruit punch, alternatively I may just add more challenger in the whirlpool.

Another question is – is it worth investing in mixed gas to get the classic nitro pour that’s associated with stouts? I may just have to invest in the mixed gas reg and a gas bottle to see!

As said above this is a solid beer and a great starting point, any changes made will be minor tweeks – all in all very happy. Its been entered into a upcoming competition so will be good to get some feedback.

Cheers

Rich

Beer is great, beer and meat is better

Over the last few months with the shed build in progress I have been un able to brew, and I guess I have been looking for other food and drink related projects, or to put it another way not brewing has given me time to indulge in a couple of other food related interests which I have been thinking about for the last year or so.

One of these interests is smoking meat -cooking low and slow, I have been wanting to try and do this for well over a year and I finally after a bit of internet based research have jumped in with both feet.

The two smokers I looked at were the ProQ Frontier Elite and the Weber Rocky Mountain and after a bit of research I settled on the ProQ Frontier Elite. Both smokers had good reviews but what sold it to me was the quick response to my questions when contacting Mac’s BBQ. It’s very reassuring when spending a few hundred quid to have questions answered quickly and it’s great to have the ability to just call up the main distributer and speak to someone about their products.

Here is the smoker

IMG_1963

One thing which became very apparent when it comes to smoking is temperature control; the ability to maintain low temperatures for extended periods of time and to be able to monitor the meats temperature is paramount. This really is the key to smoking and I realised I need to be able to tightly monitor and maintain the cooking temperature – in this aspect smoking is very similar to fermentation!

So after a bit more research and a couple of emails to Mac’s BBQ I settled on the BBQ Guru Cyber Q, this is a pretty high end temperature controller with some great features, like most things you get what you pay for.

The Cyber Q had 3 food temp probes, a pit probe which feed into the controller when then controls the Pit Viper fan and the whole thing wireless connects to your house router and with a bit of configuration you can track all the temperature over the internet and make any changes using your mobile phone or any pc with an internet connection. All very handy when your sat in a pub having a few beers!

Here is the controler with all the probes and fan attached

IMG_1951a

The day before the first cook the new smoker was seasoned, the idea being that you just try and coke up the inside of the smoker so that a few of the gaps are sealed and it’s a bit more airtight.

The one thing I have now realised is that smoking requires an earlier than usual start on the day! If a 12 hour cook is required that means a 6am start which can be a bit tricky if a few too many beers have been enjoyed on the previous night!

The day before the first smoke I went and picked up the short rib of beef and that evening I applied the rub and left the meat in the fridge overnight to marinade in the rub. The rub consisted of the following:

  • ½ cup sea salt
  • ½ cup sugar
  • ¼ cup chilli powder
  • 2 tbsp ground black pepper
  • 2 tbsp cumin
  • 1 tbsp mustard powder

First job the following morning was to get the charcoal going, a pretty big pile of them for a long slow cook. I had also purchased a BBQ charcoal chimney which is a great invention that means you no longer need to buy any sort of BBQ fire lighters.

Once the charcoal was alight more were added and the unit was assembled with the water bath full of boiling water in the bottom of the smoker.

The meat was then added to the smoker and the pit temperature was set to 225degF looking to achieve a meat temp of 195degF after the 10-12 hour smoke.

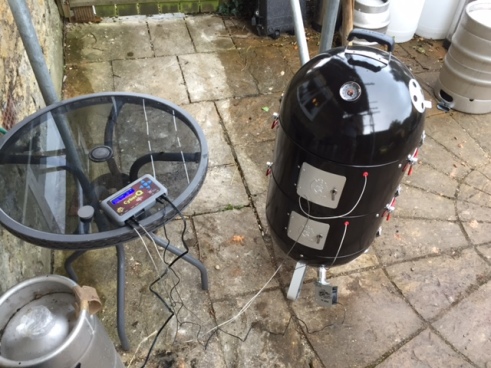
Here is the smoker all set up with the temperature control in action

IMG_1964

The following pictures were taken of the meat at 3 and 6 hours

As already mentioned the CyberQ allows you track the temperatures of the smoker from your mobile phone and this proved invaluable as at 8 hours in I found myself sat in a pub with beer in hand and I was able to notice that the pit temperature was dropping off slightly, this meant that I had a quick 3 pints then headed home to add some more charcoal to the smoker and soon the temperature was back up where it needed to be.

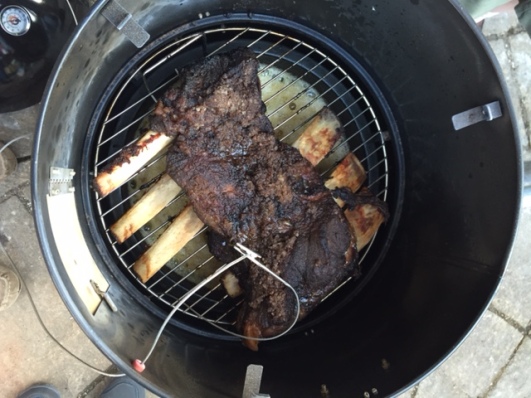
This was the short rib after 11 hours in the smoker, with the meat and pit probe in place.

IMG_1967

The meat went down pretty well, the main evidence being that there was not much left! But my one main comment  and a change I will make when I do this recipe again is to remove as much of the rub as possible before putting the meat into the smoker, as it was a little salty if you got a bit too much if the rub when you bit into the meat.

All in all I was very pleased with the first effort; next on the list will be lamb shoulder closely followed by some pork ribs.

Will post further pictures and details of smokes over the coming months.

Cheers

Richard

Building a brew shed at the end of the garden – part 2 almost ready to brew

It’s been another bust 5 weeks and although progress on the brewery shed is slowed I’m not too far from getting the first brews on.

So what has been achieved? Well the building is clad in the Siberian Larch, the electric supply is in, as well as water, and there is even a sink! And most importantly from the view of the missus the back room now had a dining table and all the brew kit is in the shed.

So the shed from outside is looking smart, clad and it even has doors!

IMG_1984

The only thing missing now is the patio but that may be a while due to what could be best described as renovation complications in the house, lets just say the roof has been leaking for a while and when the windows were taken out some of the lintels were a little rotten and in some cases non-existent!

The floor has been painted, the block walls have also been painted

IMG_1865

The walls behind the brew kit have been covered in 2mm hygienic plastic cladding

IMG_1903

One of the most important (and expensive) jobs was getting electricity to the shed, and now there is a 60amp supply run from the house via a nice bit of 16mm2 armoured cable. I have a 32 amp supply for the control panel, 12 double sockets, and 5 LED strip lights all running from  the sheds own distribution panel.

The brew kit is in its new home with the main brewing vessels in about the right place.

IMG_1957

A water supply has been hooked up, along with drainage and the RO machine has been mounted above the sink and plumbed in, along with a UV filter with has yet to be plumbed in. A sink was bought via ebay and is in and working – cold water only. But from the picture below you will see the plug socket needs to be moved, bit of a miss calculation on my part there! Hopefully in the future I will get a small wall mounted hot water heater just need to find the right product.

IMG_1954

And this is why i need an RO machine – total disolved solids (TDS) in is 350 and out is 11! The water where i have mooved to is very hard – not ideal.

My barrel collection has taken up residence at the back of the brewery, so far 5 barrels have been moved in, of the 4 wine barrels I had 1 of them looks to have been lost to an infection. It may be salvageable but I need to wait and see what happens after some intensive cleaning, worse case it will be recycled into a couple of planters. And once I get properly sorted out I should have room for 10 barrels at the back of the brewery if needs be.

These barrels are the future of any commercial aspirations I may have and will be filled shortly with a range of mixed culture sour beers and also hopefully some truly spontaneously ferment wort.

Most of the fermenters are where they will spend the next few years and now they all need connecting up to chillers and temperature controllers and will then require a deep clean before use.

IMG_1980_trimmed

The main brewing vessels have already been CIP’ed with Caustic at 80degC

IMG_1958

The store room is full already but a good sort out will again create some space.

IMG_1977

The clean room still need a window but it’s taking shape slowly.

IMG_1976

The biggest job left now is to have a major sort out, and then sell off some stuff I have not used for a long time or am unlikely to use in the future; it appears I have amassed a lot of stuff and a lot of it shinny! I did wonder at one point if the brew shed was big enough :- )

The focus now really has shifted from building too sorting/organising and simply getting the brewery up and running. I think another day or 2 of sorting and prep work and I should be good to go. Or to put it another way – the time it takes to grow up a yeast starter of Wyeast 1318 for a 80 L batch of Pale Ale and I should then be good to go. As always tho work has gotten in the way again and the starter won’t happen for a couple of weeks. But I cant complain to much as work has made all this possible.

So what going to get brewed, well once I start brewing I want to fill barrels as fast as possible as well as replenish stocks as we have pretty much run out of kegged beer. Currently we are drinking a Belgian Pale Ale which must be 6-8 months old and has been treated badly in the keg due to the house move but despite this it’s still very drinkable, and would still score 34-35 points in a BJCP comp, its not outstanding but still has no major issues and drinks very well on a hot day sat in the garden. The Belgian Pale Ale was brewed with WLP 530 it’s a very resilient yeast just like WLP565.

So very soon on the brewing schedule is:

  • Golden sour base beer, 240L batch fermented with Brett and Lacto – this will then be transferred to a first use white wine barrel
  • American Pale Ale 80L batch fermented with Wyeast 1318
  • Dry Stout 80L batch fermented with Wyeast 1318 top cropped from the pale ale
  • Imperial smoked Porter, 140L batch, this will be aged in a ex Jack Danial’s barrel, the yeast for this will be cropped from the stout
  • Red sour base beer, 240L batch fermented with Brett and Lacto cropped from the pale sour base – this will then be transferred to a first use red wine barrel.

So hopefully some 760L of wort will be produced, 3 barrels will be filled, and keg supplies will be replenished!

Well thats the plan, guess there will be a part 3 now showing one of the upcoming brews!

Cheers for reading

Richard

Building a brew shed at the end of the garden – part 1 getting the building up

So at the end of March the missus and me bought a house and on the 27th April we packed the house in London into removal vans and headed West into the sun! We had two removals vans one for the house and one for the brewery – I really have managed to amass some home brew kit it seems!

11220847_10154176907833384_1346773972378963693_n

One minor snag, the house we had bought had nowhere suitable for me to brew, so the simple answer to me was to build a brew shed and by shed I mean a 6.5m x 5.7m monster of a brew shed. One catch, the missus is an architect so it has to look good from the house, all I will say here is Larch is not cheap!

The house we had moved out of had the better part of a triple garage and I had managed to fill that so I needed to get organised to fit it all into the new shed, I was also adamant that I wanted a clean area where I can propagate yeast and do some basic lab work away from the dust and dirt of the brewery area, and also to keep the missus happy and not have yeast starters going in the kitchen!

The obvious answer to me was to divided the shed are into three, the main brewing area, a store room (which is bigger than my first bedroom as a kid) and a yeast lab/clean area.

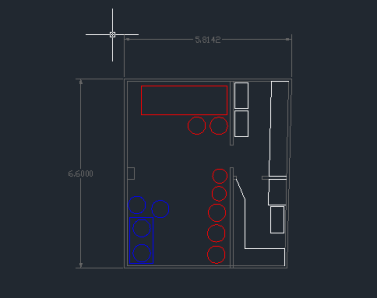
Here is a CAD drawing with a general layout and arrangement of equipment – it’s amazing what can be built under Permitted Development!

shed plan

In blue is the brew kit, red is the fermenter and barrel area, and white is storage and yeast lab.

When we moved in the house did have a shed at the bottom of the garden which was the width of the garden and about 3.4m from front to back but it was in a shocking state and even came with a cement/asbestos sheet roof. As the shed formed the boundary on the back and the sides it was decided to keep those walls but the rest had to go! What follows is a series of photos and comments as the demolition progresses.

This is the origional shed with the windows and door removed – its lovely!

IMG_1741

And a bigger hole!

IMG_1743

So with the demolition done the first thing to do was prep the ground for the new concrete slab and to install the threshold drain across the front of the building.

Its even, well almost straight and level ish!

IMG_1745

Then came the fun of the concrete pour, and how do you get 3.5 cubic metrers of cement into the back garden of a house with no real rear access? You pump it through the front door, up the hallway, through the dining room, kitchen, out the back door and down the garden! And it worked a treat here is a few pics of that operation in action, i have a video but this will have to come in part 2, i cant download it where i am at the moment!

This the pump truck and concrete wagon

13102647_10154208307808384_673204595265443813_n

And through the front garden goes the pipe!

13165872_10154208307838384_8531019492884743935_n

And the start of the pour, had help from me best mate Steve,  Ken (Father) and Uncle Steve, all avid drinkers of the brewerys produce!

13165866_10154208307923384_804371081921562834_n

Not quite so clean nearer the end of the pour!

13151382_10154208307958384_5463270185193549444_n

And a couple of hours later you end up with this. The concrete was specked for light industrial use but was also reinforced with plastic fibres, god help anyone that wants to remove this concrete base in the future!

IMG_1756

And the following day the concrete has gone off very nicely!

IMG_1757

2 days later we laid one course of blocks for the new timber frame addition to sit on.

IMG_1763

Then it was time to start the timber framing

IMG_1770

Followed by more framing and the roof joists, which are 195mm x 67mm JJI Joists which gave up to a 4m span at 600mm spacing. The biggest span in the shed being 3.6m.

IMG_1772

Then it onto the roof build up, I went for whats known as a warm roof, on top of the joist went 18mm OSB. Tea breal time and stress tested the joist too!

IMG_1778

IMG_1777

Followed by a self-adhesive vapour barrier.

IMG_1780

Then 25mm of insulation stuck down to the vapour barrier.

IMG_1781

Then on top of that a 1.5mm EPDM rubber roof. Luckily the weather played and this all went down without any rain falling, thats untill it was just about down, but not totally finished! At this point I went to the pub!

IMG_1784

The roof was on and now we had tomake it water tight, the outside was covered in a membrane and battened over to keep it secure. More battens will be added for the cladding

IMG_1801

The new timber framed sections then got filled with 50mm of foam insulation and then a vapour barrier.

IMG_1802

Then all the internal and external stud walls were lined with OSB – finally taking shape

IMG_1809

It was at this point, about 4 weeks since the start of the shed build, and 5 weeks since moving in I had to go back to work for a few weeks, so the build is now on hold for 4 weeks then it will be full speed ahead again as I want to get brewing in July and drinking fresh homebrew again by early August!

On the to do list now is:

  • Paint the floor and wall
  • Line area closest to brewing vessels with white plastic
  • Make doors
  • Clad the new addition in Larch
  • Dig a soakaway
  • Sort out drainage for the sinks – need to get it to the house drains!
  • Electrics – 60amp supply is needed!
  • Get water supply to the shed
  • Move in brewing equipment and get set up
  • Lay patio as summer is coming only a small one 2m x 6m – accordong to the missus this is very important

Not to mention working on the house and the front garden, needless to say I’m going to be even busier over the coming months!

Part 2 of this blog post should be published towards the end of July or August time – fingers crossed!

Cheers

Rich

Brewing hoppy beers for LSE homebrew competition

For the 2016 comp I decided to concentrate on hop forward beers and as such brewed the following:

• US Pale Ale
• US IPA
• DIPA

For hoppy beers the ideal thing would be to brew them so they will be in the bottle the minimum amount of time before the comp, however due to work I will have to brew them 3-4 weeks earlier than I would have liked, so these beers will be as much a test of my bottling process as they will the brewing its self. The key here will be limiting oxygen exposure during bottling even though they will also be bottle conditioned.

Anyway on to the crux of what this blog post is about – brewing hoppy beers and the process I will be using to brew the USPA, IPA and the DIPA, the process will be the same and it is the process that is the important bit!

Recipe formulation
If you don’t brew a beer to the style guidelines you really are making life difficult for yourself! There is more than enough information on the web to point you in the right direction and gives plenty of detail on recipe design – The Brewing Network – Can You Brew It show is a great place to start!

The grists
The base malt should be low colour pale malt, low colour Maris Otter if you can get it but low colour is the important bit. You want to be able to build in the malt base not be stuck with what you have been given by the base malt.

I have used a variety of grist over the years for Pale Ales and IPA’s and I now have a couple of grists that I have honed in, the one given below is for the PA I will be brewing for the LSE 2016 comp.

90% Low colour pale ale malt 4ebc
5% wheat malt 4ebc
3% Cara pils 4ebc
2% Caramalt 30ebc

The only difference for the IPA is that 7.5% of the pale ale malt is substituted for munich malt, this is simply to give the beer slightly more malt base to support the high IBU’s and bigger hop flavour.

The DIPA is a bit different it is simply 94% pale ale malt and 6% dextrose to make sure the FG is around 1.008! The idea here is the malt is simply a platform for the big hop aroma.

The mash
A single infusion mash will more than do the job, and even though I have a RIMs system both the pale ale and the IPA will get a single infusion mash for 60 min. The RIMs system will however be used to stabilise the mash temp and guarantee a clear wort for the transfer to the boiler.

The DIPA will be mash at 64degC for 60 min the ramped up to 68degC for 10min before being ramped up to 74degC for mash out, this is to ensure a very fermentable wort.

I am trying to move away from stepped mash temps as if I ever have the daft notion of going pro trying to conduct step temp mashed on a budget will be tricky although not impossible – I have a cunning plan!

The hops
The PA and IPA will receive a small bittering addition of Columbus totalling 10 IBU’s at the start of the 90min boil, and then the rest of the hops will go into the whirlpool. All hops are big popular US varieties like Citra, Mosaic, Simcoe, Centennial and Columbus.

So into the whirlpool, and a big addition of hops is added for a 30min stand. The temp of the wort in the whirlpool is upwards of 97-99degC. Both of these beers will be 50L batches and the hop additions will be 220g from the PA and 340g for the IPA, the PA will get 45ibu’s from this addition and the IPA 60ibu’s. I’m taking a bit of a risk here with the IPA, I’m backing off the bitterness and really loading up the Whirlpool and dryhop additions to see if I can produce a softer more fruiter hop aroma centred beer as apposed a bitter kick in the teeth, which in the past is what I have had success with.

As were are on the topic of whirlpool additions its worth noting that Brewdog has a heat exchanger fitted in between their kettle and whirlpool and they now drop the temp of the wort down to 80degC for the whirlpool addition, this means they are no longer isomerising as many of the hops acids so are getting a small contribution of IBU’s from this addition but they are getting a better flavour and aroma from the whirlpool additions. At the other end of the brewing world this is also something that the Tennent’s brewery in Glasgow does and latest research from VLB supports that the best aroma is gained when whirlpooled at 80degC ish. This is something I am very interested in trailing but would need to get a small heat exchanger made up that can deal with hop material without blocking for the transfer.

The DIPA will be bittered with hop extract and then also receive a hop addition of 300g at 15 min to go before also receiving a massive whirlpool addition in the order of 450g, again for a 50L brew length.

For big hoppy beers I really believe you should be using hop pellets for both the best flavour and aroma, to start with they have had 10% of the hop leaf material removed hence the name T90, they store better both from a size point of few and less prone to oxidation, and most importantly they can be used in a whirlpool!

This is the bit I don’t understand in the UK most craft brewers are avoiding the use of the whirlpool they are just knocking out directly from the boiler, you can easily say the brewers in the US are leaps and bounds ahead of the UK when it comes to big hop aromas and flavours and I think a lot of this is all due to the use of hop pellets and the Whirlpool (and yeast but will get to that shortly). The whirlpool or at least whirlpooling is key to great hop flavour and aroma – in my opinion, it also ensure that the least amount of hot break material makes it into the fermenter which is also very important for product stability.

Dryhoping of all 3 beers will take place once the primary fermentation has died down. The PA will receive only one addition, the IPA and DIPA will be double dryhopped. Time on the dryhops is limited to 3-4days per addition and all additions are made at 19-20degC. If a 2nd addition is to be added like in the case of the IPA and DIPA the first addition and the remaining yeast will be dropped out of the conical. Once all dryhoping is complete the beer in the conical is crash cooled to 2degC for 5-7days.

The PA will receive a single 50g addition, this is simply to lift the final aroma a notch as to be honest the aroma from the whirlpool additions is more than enough. The IPA will receive 2 dryhop additions each addition being 250g and contact time will be 3days per addition. The DIPA will receive 2 dryhop additions, each addition being 400g! Again contact time will be limited to 3 days per addition.

Nothing mentioned above is rocket science, but the secret to getting good hop aroma in building the layers of flavour from the hops and then limiting contact time with the hops and most of all keeping oxygen away from the beer!

What yeast
Dried yeast makes good beer but if you know how to handle wet yeast then you can make fantastic beer. I have been brewing with a wide variety of yeasts over the last 18-24 months or so and my favourite yeast has been Wyeast 1318, London Ale 3, it is my go to yeast for British styles and non dryhopped beers. This yeast combined with Citra hops in a 3.8% session pale ale is exceptional but when it comes to big IPA’s that are heavily dryhopped I just can’t get past the lack of clarity of the beers it produces. Even though they taste fantastic and I would happily drink them all day long at home, but for competitions they are just going to get marked down – it’s a shame but it’s the truth of it.

As such I end up coming back to WLP001 and WLP007 probably the 2 most used strains for brewing IPA’s in the USA. In the UK this accolade would most likely go to US-05! The safe option and the yeast I have had most success with in the past is WLP001 but this time I thought I would try something a little different – WLP090, which is a yeast I have never used before but I have high hopes for, time will tell I guess. From the reviews I have read, it ferments like a beast, allows slightly more malt flavour to come through and still also lets the hops shine, and importantly its drops brighter than WLP001.

Yeast propagation
Fermentation is extremely important when it comes to hoppy beers, a clean healthy fermentation is vital. For this the correct amount of healthy yeast must be pitched, and the use of yeast nutrients including zinc, and oxygen is vital. Below is my typical pitching rates and yeast propagation procedure.

First thing calculating yeast needed, the yeast calculator on Brewers Friend is my calculator of choice. As a general rule when using ale yeast I will pitch the following:

• OG up to 1.050: 0.75 billion cells / ml / deg plato
• OG 1.050 to 1.070: 1 billion cells / ml / deg plato
• OG 1.070 to 1.090: 1.25 billion cells / ml / deg plato
• OG 1.090 to 1.100: 1.50 billion cells / ml / deg plato
• OG above 1.100: as much as you can muster!

Then use the above pitching rates in the calculator to calculate the starter sized required, all starters should be well oxygenated prior to pitching the yeast, and yeast nutrient should be used. Propagate on the stir plate at a temp of 26-28degC and once fermentation activity stops, stop the stir plate as continued oxygenation will just deplete the yeast glycogen reserves and reduce viability and vitality of the yeast.

I would also avoid the used of cold crashing the yeast starter following propagation, the latest information shows that yeast which is cropped following cold crashing has a lower viability and vitality, if possible hold the starter at a temp of 13-15degC to aid flocculation and just give it another 24hours to drop.

Fermentation
Typically yeast is pitched into wort at 17degC and is then allowed to free rise in temp to 19 where it is held till fermentation is 2/3 complete at which point it is then raised to 20-21degC depending on the yeast.

I ferment all hoppy beers in conical fermenters and will do my best to ensure that a CO2 blanket is maintained at all times, once the yeast has been pitched oxygen and oxidation is the enemy!

Once the fermentation and dryhoping is complete all the beers will be cooled down to 1-2degC where it will be held for 5-7days, this is to try to drop the beer a bright as possible before bottling and kegging.

This is where I would like to change my process and will most likely be doing so over the coming few months. I would like to fit a spud valve to the fermenter and then use the last few points of the fermentation to pretty much carbonate the beer. I would also like to fine the beer in the fermenter using a vegan friendly finning agent.

This will then enable relatively bright carbonated beer to be bottled and kegged directly from the fermenter.

This then leads to the question is it worth using a product like to Brewers Clarex to deal with chill haze? For home brew – no, but if looking to sell the beer commercially may be yes not only does it remove chill haze but it also massively improves the stability of the beer, thus increasing shelf life.

Bottling
Even though all the beers will be bottle conditioned I will connect a beer gun to the fermenter, then excessively flush the bottles with CO2 before filling with beer. All the hoppy beers will be bottled to approximately 2.8 vols CO2, the DIPA will be re seeded with fresh yeast to ensure carbonation in the bottle.

The hope here is to minimise any DO pick up and any that does occur will be removed by the process of bottle conditioning – you can brew the best PA, IPA or DIPA and all that effort is then wasted by doing a bad job on the bottling.

The beers will then be kept at 20degC for 10days before being shipped off to the competition.

Then it’s up to the judges!

Cheers

Richard

Well time for an update – the hoppy beers did not medal but I did pick up a few prizes along with coming 3rd in the Championship brewer comp.

It seems that’s as the beer had to be brewed early and it also looks like I under carbonated a bit the beers just did not do very well – live and learn!


Prep for the upcoming LSE homebrew comp

The London and Southeast craft beer festival (homebrew) is looming in the not too distant future. After a few months of planning a brewing schedule and working on recipe formulation it now looks like I will be moving house on or around the date of the comp/festival!

And unfortunately in the house I will be moving to I will pretty much need to build a new man cave/brewery and then install all the equipment so I will be out of action brewing wise for a couple of months from April/May onwards. This pretty much means the only comp I will be entering beers into this year will be the LSE comp and even these will be a somewhat rushed set of beers due to having to work. If im lucky I may just be able to get a few beers into the National but not going to hold my breath on that one.

So what am I looking to enter into the LSE comp this year? A bit of a range of beers really, for the event I will have/already have especially brewed:

  • German Pils – currently lagering at 1degC (new recipe first batch)
  • Belgian Triple – sat in a fermenter waiting to be bottled and kegged
  • US Pale Ale – need to brew – tweak of a favourite brew – new yeast
  • IPA – need to brew, its an all new beer, not a rebrew of an old Gold medal beer
  • DIPA – need to brew – a rebrew of a beer that went a bit wrong!
  • And if time a British Pale Ale

And from the stocks

  • Table Saison – bottled and carbonating
  • RIS 2014 batch – bottled almost 2 years ago
  • Cherry barley wine – bottled over a year ago
  • Apricot barrel aged Farmhouse (sour) Saison – if ready
  • A barrel aged something or other – lots to choose from

The plan is to do a fairly detailed posts of the Pale Ale, IPA and DIPA going into the brewing process and the method by which the beers will be hopped – all three beers will be brewed using exactly the same process the only differences will be the amount of grain and the amount of hops, the DIPA will be using a truly obscene amount of hops!

Will blog about the PA, IPA and DIPA as the beers are brewed in March.

Cheers

Rich

Imperial Black Rye IPA brewed for the 2015 Black Friday Comp

Have been meaning to post this for a couple of weeks, it was put on the LAB forum back on the 26th September when I was still planning to brew this beer but never got round to putting it on the blog so here is – a slightly edited version of the LAB post.

A few months back the Black Friday homebrew competition was announced and it immediately moved brewing a black IPA well up the list of things to brew.

A fair bit of research into the general style followed and I came up with the following its basically a clone of a well-known US beer I have never tried, but with a change to the dryhopping, and obviously using all British malts!

It should be fairly easy to guess the beer being cloned from the yeast, mash schedule and grist and the title of the blog post, if you did not guess it, its Firestone Walkers – Wookey Jack!

Info on the brewing process

So the yeast – to get the WLP002 to attenuate to where I want it I will be mashing in at 63degC for 60min, then ramping up to 68degC for 10min before ramping up to 76degC for mash out. The idea here is to make the wort as fermentable as possible. Its going to be a 50L batch and I’m working on 75% mash efficiency as the OG will be a little higher than standard worts I normally produce.

The boil will be for 90min before transferring to the whirlpool for a 30min rest, the wort will then be knock out to the fermenter at 17degC. Yeast will be pitched at 17degC and allows to ferment at 19degC for approx 5 days, the first lot of dryhops will then be added and the temp will be allowed to rise to 21degC for the diacetyl rest, for 3-4 days, the yeast and first dry hop will be dropped out of the cone and the second dryhop will be added for 3 more days.

The fermenter will then be crash cooled for 7days before bottling/kegging.

The Grist/hops

Ingredients
Amt Name Type # %/IBU
14.30 kg Pale Malt (2 Row) low colour UK (4.0 EBC) Grain 1 75.5 %
1.92 kg Rye Malt (9.3 EBC) Grain 2 10.1 %
0.58 kg Carafa III (1300.0 EBC) Grain 3 3.0 %
0.58 kg Mindnight/black Wheat Malt, Bel (1000.0 EBC) Grain 4 3.0 %
0.58 kg cara rye (100.0 EBC) Grain 5 3.0 %
1.00 kg Corn Sugar (Dextrose) (0.0 EBC) Sugar 6 5.3 %
20.00 g Columbus (Tomahawk) [14.00 %] – Boil 90.0 min Hop 7 15.5 IBUs
30.00 g Amarillo Gold [8.50 %] – Boil 30.0 min Hop 8 7.2 IBUs
30.00 g Citra [12.00 %] – Boil 30.0 min Hop 9 10.2 IBUs
30.00 g Amarillo Gold [8.50 %] – Boil 10.0 min Hop 10 2.8 IBUs
30.00 g Citra [12.00 %] – Boil 10.0 min Hop 11 4.0 IBUs
150.00 g Amarillo Gold [8.50 %] – Steep/Whirlpool 30.0 min Hop 12 19.5 IBUs
150.00 g Citra [12.00 %] – Steep/Whirlpool 30.0 min Hop 13 27.6 IBUs
1 million cells  per ml per deg Plato English Ale (White Labs #WLP002) Yeast 14
100.00 g DH1 Amarillo Gold [8.50 %] – Dry Hop 3.0 Days Hop 15 0.0 IBUs
100.00 g DH1 Amarillo Gold [8.50 %] – Dry Hop 3.0 Days Hop 16 0.0 IBUs
200.00 g DH2 Simcoe [13.00 %] – Dry Hop 3.0 Days Hop 17 0.0 IBUs

Yeast nutrient and Whirlfloc added at 10 min to go in the boil. Water profile – IPA from the book Water adjust to hit correct mash pH.

And the vital stats

Est Original Gravity: 1.077 SG
Est Final Gravity: 1.015 SG
Estimated Alcohol by Vol: 8.3 %
Bitterness: 85.9 IBUs
Est Color: 75.1 EBC

This beer was bottled and keg on the 4th November, the bottles were bottle conditioned at 23degC for 4 days before I had to post them off to the competition as I was going to be out of the country after this for a bit. Not ideal but they had pretty much carbonated by this point. The keg version of the beer was tasting fantastic after it had been force carbonated, quote from the misses was along the lines of “best beer you have ever brewed” so all looks promising for the competition!

I also have a 20L Pin of this which I am looking forward to drinking at some point soon – hopefully shared with a few friend!

Will post the feedback on the beer after the comp results have been announced!

Cheers

Rich

Update 28-11-2015

Well this did pretty well at the Black Friday competition, it came first in its category and the came 2nd in the Best of Show.

It scored 43 points and comments were generally all positive, however both judges said the bitterness at the end was a little astringent so this can be worked on for the next batch but to be honest I would change very little else in this beer.

I will now work through the remaining 30L I still have at home – what a hard ship!

All in all pretty happy with how this one turned out as it was the first batch of BIPA I have brewed and most of all I’m a real convert to using WLP002 in big hoppy beers, it really complements the hops, is more than capable of attenuating to get the beer to finish dry and just add a level of complexity that has been missing in some of my beers fermented with WLP001. Let the British yeast experiments continue.

Cheers

Rich